You’ve set up your website now. All the basics are done and you’ve published your first post even. The next step, obviously, is to customize your website to look and function exactly like you want. Thankfully, both WordPress.com and WordPress.org have a variety of customization options. The latter has more options than the former, but that doesn’t mean WordPress.com is lacking by any means. There are still enough WordPress themes for you to take advantage of to make your website look how you want it to look.
In this guide, we will look at customizing both your WordPress.com website and your WordPress.org website.
Let’s start with WordPress.com.
Table of Contents
Your WordPress Dashboard will look like this:

As stated in our WordPress Beginner’s Guide, Customize and Themes can be found by scrolling down the menu on the left side of the dashboard. And right now, those are the two options that you need.
Since you are starting with a new website, your first step should be to find a theme that fits your vision for how your website should look. When you click on the Themes option, it will display the list of available themes as such:

Here, you can search for a theme based on what kind of site you are creating and a variety of other options. You can filter out just the Free themes or Premium themes as you need. Several themes that are a good place for Beginner’s to start with are displayed at the top with the “Beginner” banner.
For the sake of simplicity, we will pick the ‘Twenty Nineteen’ theme to use for this guide. You can either pick the same or pick a different theme. Any changes in customization options will be very minor.
Once you find a theme that you like, click on the theme. You will see a page that previews the theme and allows you to see a live preview of how a website made with the theme will look like. You can explore those options, if you wish, but what once click on ‘Activate the Theme’, WordPress will apply that theme to your website and then offer you an option to either learn about the Theme or directly jump to customizing your website.
You can learn about the theme if you want, but the next step is to open the WordPress Customizer, either through the option at the Theme Activation screen or the Dashboard.
The WordPress.com Customizer looks like this:

On the right side is a live preview of how your website looks. You can use this to track the changes you make and see how they affect your website as you go about tweaking it’s look to fit your desire. On the left side are the Customization options.
Note: CSS means “Cascading Style Sheets” and it is a programming language that is used to customize websites. AMP stands for “Accelerated Mobile Pages”, which is an open source program that is intended to make websites load faster and perform better for mobile users.
You are now familiar with the variety of options available to customize your website through WordPress.com. By experimenting around with the options, you can very easily master the basic customization options. Once you’ve made yourself comfortable with the available options, we recommend you to take a look at other available themes and play around with your website till it looks exactly like you want it to. If you’ve just got the basic Free plan, you can still pick a Premium theme and buy it, if you want to.
If you are a WordPress.com user, you now know your way around to the basic customization of your website. However, if you are a WordPress.org user, read on.
Once you’ve set up your WordPress.org website, customizing it is not that difficult. The process, while quite similar to the process for WordPress.com, there are differences to consider. The process of customizing your WordPress.org website starts in your WP Admin dashboard.

If you’ve just created your website, you will have the big blue button that says ‘Customize Your Site’ – which is a viable option, but here, we will go through the Appearance option in the menu. When you mouse over the Appearance option, it will bring up a list of options, showing links for themes, widgets, menu, header, background, footer and etc.
We’ll just click on Appearance, which will open up a screen that looks like this:

This screen displays a list of the themes you’ve added to your website. These themes are not active at the same time – obviously. To activate a theme, you will have to mouse over the theme you want and click ‘Activate’. To customize a theme, you will click the blue ‘Customize’ button on the currently active theme. By clicking on the big plus sign or the little button that says ‘Add New’ at the top of this screen, you can browse a number of themes available to be added to your website.

You can browse here until you find a theme that you like, filtering by several options or searching for one that will suit your needs. Once you’ve found a theme you like, you can either preview it or directly install it to your site. You can also download WordPress themes from many places around the internet and upload it to your site using the ‘Upload Theme’ button at the top. Once you’ve installed a theme to your website, either by choosing from one of the many available options or by uploading a theme of your own, the theme will be available in the main Themes screen, however it will not be activated. That part you will have to do yourself.
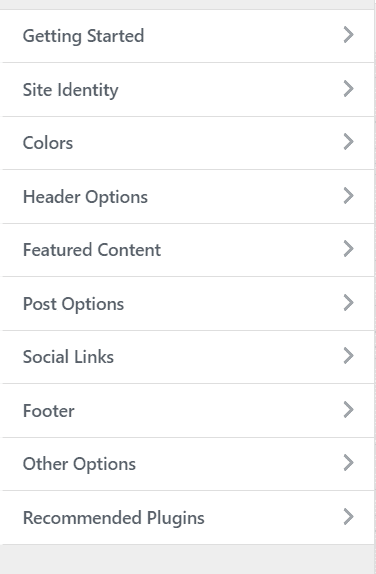
Once you’ve activated the theme you want, you will click on the ‘Customize’ button – we’re using the BlogWP theme – which will take you to the WordPress.org Customizer. The WordPress Customizer looks like this:

Much like the WordPress.com Customizer, this has two major parts. On the right there is a live preview of your website, allowing you to track the changes you make as you make them. On the left is the control menu.
While most of the options allow some form of customization for your website, most of the visual customization happens under ‘Theme Options’. When you click on it, your Menu will look like this:
Using the variety of options in WordPress and your chosen theme, you can customize your WordPress.org site to look just like you want it to. If a certain theme doesn’t have the options you need, you can always find another. There are over 3,000 themes available, free of charge and way more than 10,000 themes that you can purchase for use with your site, so you’re never really lost for customization options.
You now have the knowledge to use the power of WordPress.org and the multitude of available themes to make your website look exactly as you want.
However, there are some other non-visual customization options that you can and should alter to suit your website. These steps optimize your website for search engines and make it easier to manage, and so they are vital in ensuring that your website is fully functional and reaches its intended audience. These steps include making sure your website is indexed by search engines, that there is a proper permalink structure,
This is a very simple step that will allow your website to be indexed by search engines like Google, Yahoo and Bing. In the main dashboard, mouse over ‘Settings’ and click ‘Reading’. There are a number of options here, but what you need to do is ensure that the ‘Search Engine Visibility’ option is left unchecked.
Permalinks, or ‘permanent links’ in their grand full form, are… permanent links. They are the solid, unchanging link through which the whole world and the internet identifies individual content in your website. The default permalink structure in WordPress is fine, but it is not the most optimized one.
To change your permalink, mouse over ‘Settings’ in your WP Admin dashboard and click ‘Permalinks’. You will see the following screen:

By default, your WordPress permalink will be set to be ‘Plain’. There is an option that allows you to customize exactly how you want your permalink to be structured through the use of tags, but for most purposes, you should be fine with choosing ‘Post name’ as your permalink structure.
The plain permalink is no good for either humans or for the search engine crawlers that index your website. Why?
Let’s say you publish an article titled “The Definitive Proof That Elvis Presley Was A Martian”.
Under the ‘Plain’ permalink structure, the link to your article will look something like this:
https://www.yourdomainname.com/?p=231
That says nothing to anyone. If someone copies and pastes your link to share with someone else, there is no information conveyed in the link itself. More importantly, no information is shared with the search engines trying to index you. The same article with the ‘Post name’ structure will look something like this:
https://www.yourdomainname.com/proof-elvis-presley-was-martian
Now, you’ve given a hint as to what your page is all about to anyone who sees the link. Search Engine crawlers will know what content your webpage has and will index it accordingly so that when someone searches Google or Bing for proof that Elvis Presley was a Martian, they will find your article.
With your theme selected, installed and modified to your taste and both the Search Engine Visibility and Permalinks options are altered to suit your needs, your website has been customized to look like you need it to and function in a way that is to your best interest. There are a lot more things that can and need to be done, including exploring plugins, widgets, setting up backup and security and more. RankToday is here to help you with each successive step as you work on building up your website.


