Here we’re going to cover a feature introduce to us since WordPress 5.0 this is the Gutenberg. Relax I’m not talking about the creepy uncle Gutenberg and his new blog about cooking tips, nor Johannes Gutenber. I’m talking about the new block editor for WordPress! Although when it comes to this baby we might as well be talking about a precious jewel.

Puns aside, this new editor was introduced in WordPress 5.0 and it became a favorite in the WordPress arsenal.
Allows a new user with zero experience in webpages, to be able to produce a decent outlook for its site.
It’s a block editor, so this means the user has more direct interaction than ever. Being able to build forms, tables and pretty much anything you want in a post with just a few clicks. No need to enter almost any code. This one of the main reasons for its fame, giving people with little knowledge a fighting chance in today’s web-developed world.
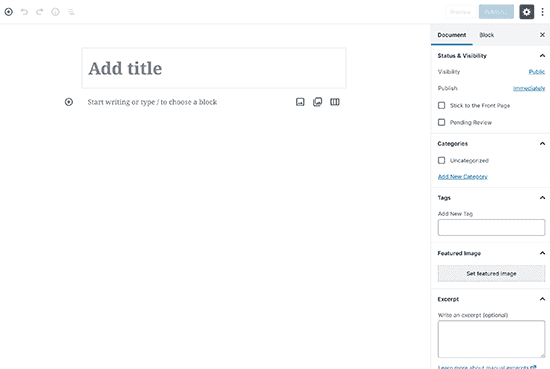
The main look of the editor is something like this.
Now, I know the concept of block editor is relatively new for some, we'll dive into that for just a bit. A “Block” it’s basically a content element that you can add to your editor, coming with various layouts and templates. Anything you add to your post with this editor will be considered a “Block”. This goes for images, videos, paragraphs, galleries, list tables and more with the addition of plugins.
Here we’re going to go over a few tips and how-to’s using the Gutenberg Editor. Beginning with.
Table of Contents
Ok this is really not complicated at all. We begging like you would with any new post Clicking on “Post” and then “Add New”. Continued this will start the editor.

Now every post should star with the title, right? That’s what the first block is for.
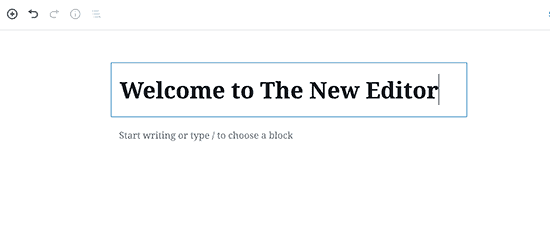
Once you’ve settled for one just click below it or hit “tab” on your keyboard, to get to a different section. By default, you’ll be in a new paragraph block. This can be altered later on, however it’s the most accustomed approach. To add something else just click on the “+” symbol to your top-left, or to the left of a preexisting block.
This will open the block menu. It will show a list of all the block available and also has a search bar on top. Select the category you’re looking for and then select the block you want. In case the mouse makes you feel a bit noob, you can search for the desired block using “/Example-category”.
Now that we know how to add a block to our post. Why not learn a bit more of what we can do with them? After all, with this approach it’s all we’re going to need.
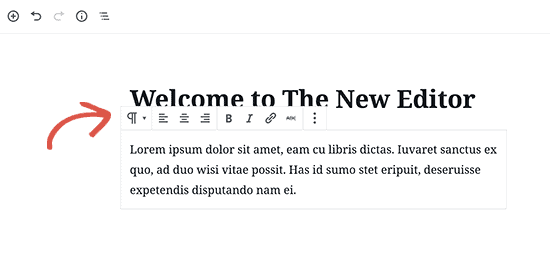
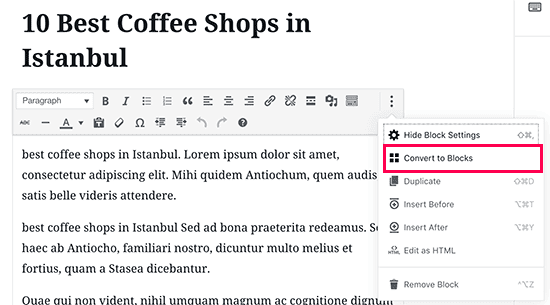
All the blocks come with their own options toolbar at the top. For example in this block paragraph we can see most of the options you’d find in Microsoft word.
Also, every block has its own settings. These can be found to your right, on a column of your edit screen. Now one of the coolest features for newcomers is the drag and drop. To move a block simply click on it, drag it and then drop it wherever you want it on your post. A block can be moved using the arrows to the left of it as well.
If you want to optimize your work flow then you are going to want and save the blocks you design or the ones you use the most often. Gutenberg editor comes with the option to save a block as a “reusable” one. This will allow you to have them at more disposal.
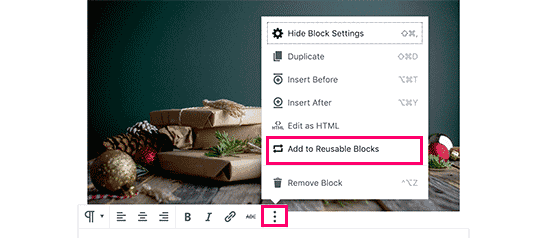
So, if you want to utilize a certain block in different posts, without the need to create them from scratch. Just click on the menu option in the right corner of any block and then click on “Add to Reusable Blocks”. Provide a name for it and save it.
You can now use this block like you would with any other, it will be found inside the Reusable category. It can also be found using the search bar. The Reusable blocks will be stored in your WordPress database. You can manage them by clicking on the option “Manage All Reusable Blocks” in the add menu of the editor.
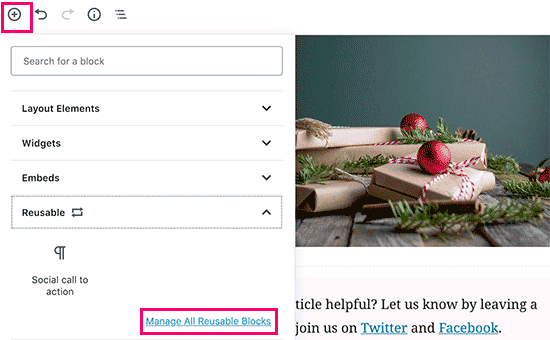
Here you can edit, re-name or delete any block you have stored. It will give the option to export a particular block and use it in any other WordPress site.
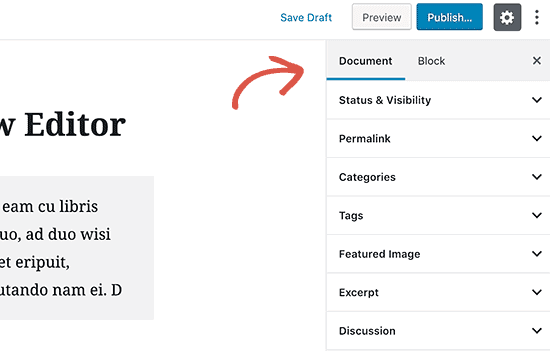
Gutenberg makes a bit easier the publishing of the metadata generated with each new post. These are, publishing date, the category and any tags pertinent, the images that are being featured, among others. This is all located to the right of your editor’s screen, in the tab that says “Document”.
Since its released Gutenberg as been taken advantage of, by several plugins that help you add features to your pages. Some of those will be presented here.
Now this is a public’s favorite. It basically adds forms to the Gutenberg editor in the shape of a widget block.
This plugin is basically a collection of easy to access and cool-looking blocks, to be added to the Gutenberg editor. Will help you in adding a many media blocks to enrich your post, more blocks mean more possibilities.
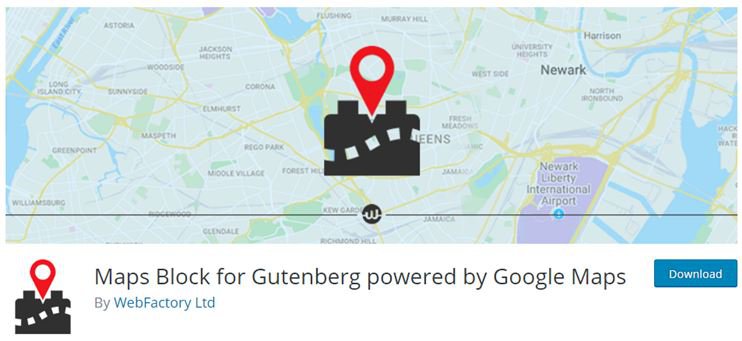
This plugin its very self-explanatory, it basically adds a map block that will allow the users access to google maps.
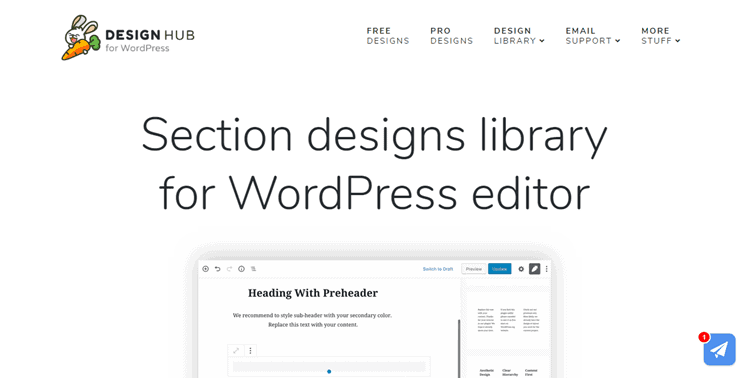
WP Design Hub, is another collection of blocks that can be added to the Gutenberg editor. It works more like a growing library with new blocks being created constantly by users. There’s a free version and a paid one with more options.
Using this editor as you have seen is a simple way to do everything the old one did. But more quickly and elegantly. Let’s introduce that to more depth, in the old editor you often wanted to add images, right? With Gutenberg it’s very easy to do.
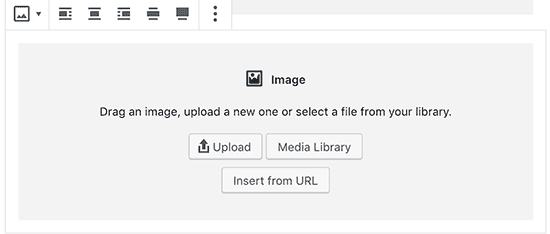
Chose and add a image block, and just upload or select a media file from the library. You can also use the drag and drop feature. Drag an image from your computer to the post and Gutenberg will automatically create an image block for it. You should see something like this.
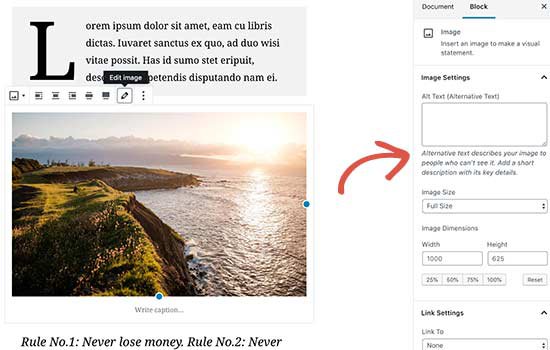
To the right, you can modify or add any metadata for the image.
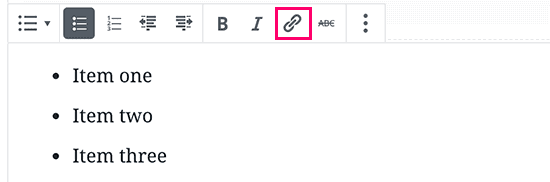
If you want to add a link to your post. This can be done by clicking on the “insert link” in the toolbar of every paragraph block. Or you can click “Ctrl + K” on your keyboard.
You can also add a gallery to your post or a video, music maybe. Anything that is available in block form can be added to your post using Gutenberg. There are many plugins that add blocks. Aside from the ones mentioned above, with this editor creating your posts has never been easier and interactive.
I know, this all seems good for beginners but a bit pointless for more seasoned developers. Well in that case you might want to use a few tricks to make you workflow better.
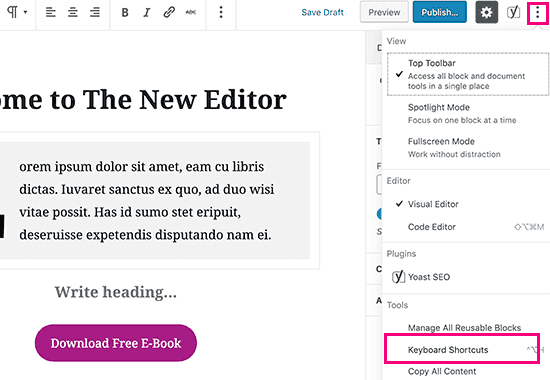
First, use the keyboard shortcuts, I mean it’s called a shortcut for a reason. Remember, use the “/” and when you type anything Gutenberg will display a list of block categories available. You can also click on the top-right of your editor to display the options, after that just click on “Keyboard Shortcuts”.
Also consider using the drag and drop for any media content, that’s unless you have something different in mind.
If this editor it’s just too out of your comfort zone you can disable it and go back to the classic editor. This can be done installing the classic editor plugin. In addition, older post can be updated and converted to use the new editor.
This is it for our little tutorial of the Gutenberg editor. Do keep in mind that most of its more profound features will have to be discovered by each user.
However we did cover near everything this editor has to offer.


